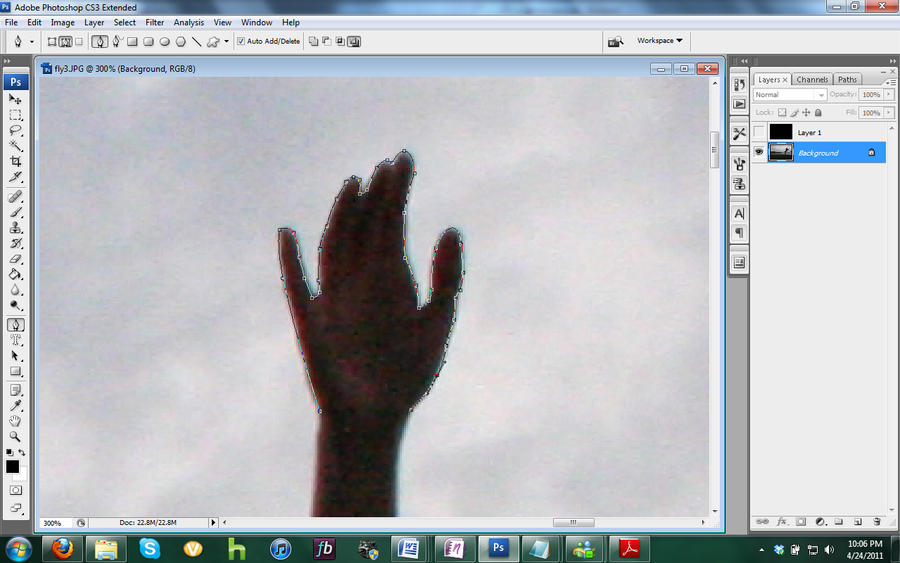
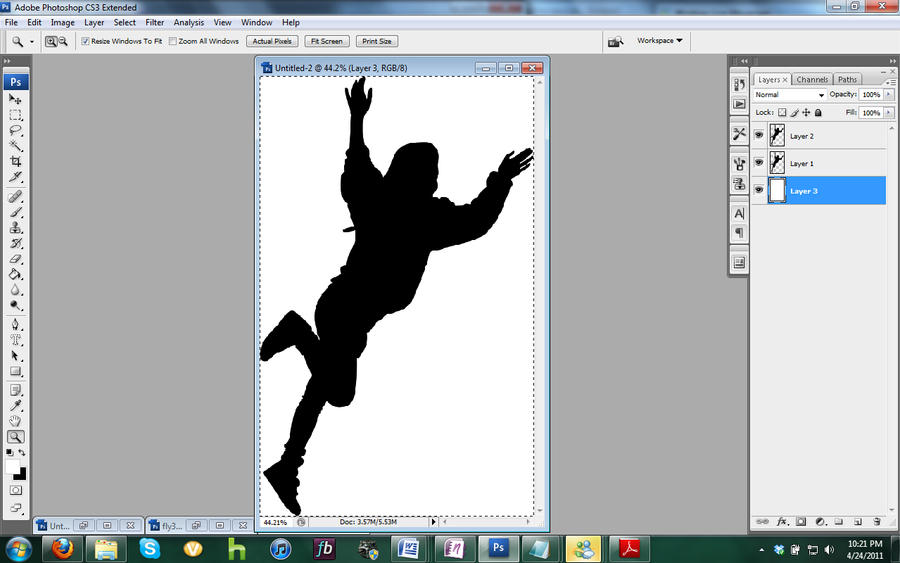
Alright, we've reached the dramatic conclusion! This collage project did incorporate some of the suggestions that you guys gave me, but unfortunately I could not incorporate all the ones I received (sorry!). However, I think that the final product is radiant. I incorporated ideas of interior/exterior in order to show that you can be whoever you want both inside and out - although, another purely aesthetic reason that I used strips instead of the whole block was because I enjoyed the collage pieces underneath and didn't want to block them entirely! I also attempted to use a diverse set of library book covers in order to represent diversity in as best a way as I could. Read on to see the final product and the last bits of the process!
Showing posts with label diy interlude. Show all posts
DIY Interlude (Part V: The Conclusion)
Wednesday, May 4, 2011
Labels:
collage,
come as you are,
diy interlude,
finished,
paper,
process
DIY Interlude: Process (Part IV)
Wednesday, April 27, 2011
Alright, we're back on track. This post is all about the concept art that will go into the final collage edits - I chose to work it out in Photoshop beforehand rather than draw and erase over and over (I'm much better at vectoring than using hand-eye coordination!).
DIY Interlude: Please Stand By
Wednesday, April 20, 2011
I am at an impasse.
I have come to love the broadsheets that I have created for the collage project so much that I feel it would almost be better to leave them as is (as opposed to cutting them up into all sorts of cool shapes), although that was not my original intention for the project. What's a crafter to do?
I believe that this "stuck-ness" is another part of my process that gets downplayed when looking at the finished project. In the midst of things, I will spend countless hours thinking about how to do something that will end up taking about two hours total. Brainstorming and setting those thoughts aside to gestate for a little while is ultimately an integral piece of the whole creativity pie.
So, fair readers, I entreat you to help me out. Check out the last DIY Interlude post and tell me: how would you like to see these pieces end up? Cut into shapes? Left as is? Something completely different? Let me know!*
*And, if I don't get any comments, it'll just be one big surprise!
Take a look at the rest of this collage process in steps one, two, four and five.
You can also check out some more posts featuring my photography.
I have come to love the broadsheets that I have created for the collage project so much that I feel it would almost be better to leave them as is (as opposed to cutting them up into all sorts of cool shapes), although that was not my original intention for the project. What's a crafter to do?
I believe that this "stuck-ness" is another part of my process that gets downplayed when looking at the finished project. In the midst of things, I will spend countless hours thinking about how to do something that will end up taking about two hours total. Brainstorming and setting those thoughts aside to gestate for a little while is ultimately an integral piece of the whole creativity pie.
So, fair readers, I entreat you to help me out. Check out the last DIY Interlude post and tell me: how would you like to see these pieces end up? Cut into shapes? Left as is? Something completely different? Let me know!*
*And, if I don't get any comments, it'll just be one big surprise!
Take a look at the rest of this collage process in steps one, two, four and five.
You can also check out some more posts featuring my photography.
DIY Interlude: Collage Process (Part II)
Wednesday, April 13, 2011
Here we are, back for part two! This post is in the form of a photographic narrative, so every chunk of text is accompanied by a colorful and enlightening photograph. Read on and enjoy!
DIY Interlude: Collage Process (Part I)
Wednesday, April 6, 2011
In this post, I want to begin take you through my process of making art through the example of making a collage. I have been wanting to start this project for a while now, so I think it will be interesting to track my steps over the next few weeks. Hope you have a good time watching it all unfold!
First Stage: Ideas
I always struggle in the idea process. I have an idea, think it's great, revise it over and over, and stress about what was reallythe best iteration of that idea. For example, here are some sketches that I did in thinking about this collage project (click for it to be bigger):
If you multiply all the sections of these sketches by about 1000, then you will get the amount of re-workings that I performed in my head. One big one was that the slogan I wanted to use changed from "EVERY WOMAN IS A REAL WOMAN" to "COME AS YOU ARE." I am also still not sure about the pose that I want to use.
I also laid out the large pieces of paper I'll be working on in several different configurations until I came down to this one as my favorite:
Take a look at the rest of this collage process in steps two, three, four and five.
You can also check out some more posts featuring my photography.
First Stage: Ideas
I always struggle in the idea process. I have an idea, think it's great, revise it over and over, and stress about what was reallythe best iteration of that idea. For example, here are some sketches that I did in thinking about this collage project (click for it to be bigger):
If you multiply all the sections of these sketches by about 1000, then you will get the amount of re-workings that I performed in my head. One big one was that the slogan I wanted to use changed from "EVERY WOMAN IS A REAL WOMAN" to "COME AS YOU ARE." I am also still not sure about the pose that I want to use.
I also laid out the large pieces of paper I'll be working on in several different configurations until I came down to this one as my favorite:
Take a look at the rest of this collage process in steps two, three, four and five.
You can also check out some more posts featuring my photography.
DIY Interlude: Small Pieces, Big Results
Wednesday, March 30, 2011
I have recently been drawing on note cards. And I have heard that some really talented writers use the method of writing a sentence on a note card (or sticky note) as a way to keep trucking on through a difficult scene. And story-boarding has been a technique in the television/movie/video game business for quite some time. So what's the craze with all these little blank squares?
Well, for one, they aren't really that intimidating. They're not infinite capacity (like a Word document) and they're not larger than your head. You don't have to feel like you're going to succumb to madness if you tell yourself that all you have to finish is writing the next sentence, drawing the next panel, or making the next study flash card for your social psychology class. They are just bite-sized enough that you can get them done in a limited amount of time, and easily carried on the go.
Besides these benefits, I think the appeal of note cards or sticky notes is just the fact that you can rearrange them. Drawing from my own experience, I find that editing a paper makes me really nervous if I don't make little annotations in between sentences such as "EDIT!" or "USE DIFFERENT WORD" or "WRITE TOPIC SENTENCE, DANGIT!" I have come to the conclusion that it is less my own madness and more the fact that when a paper is written out on a computer screen, it looks complete. Done. Presto. There's absolutely no more work that has to be done on it. Right?
I think that generalizing the usefulness of note cards and sticky notes can be really helpful. Even if you are not literally sitting down with a bunch of 3x5" cards and proceeding to draw your next masterpiece, you can use the same logic. How about writing a sentence per day in a notebook so that you can get to your ultimate writing goal? Or drawing a picture section by section (or stage by stage: contour, color, shading, background)? Taking small pieces can make a really great whole. And you won't be freaked out by the monolithic "done-ness" of a particular thing - it's always easily editable, easily moved around, and never set in stone.
Give the note card thing a try and see if you like it, and be sure to leave a comment about what you think of doing things in small chunks!
DIY Interlude: Improvised Veggie Soup
Wednesday, March 23, 2011
Last week, I made my first good homemade soup in the company of my significant other, Josh.
Interestingly enough, unlike most of my other creations, it has come without any use of a recipe. Being a baker, I am notoriously addicted to clear and simple recipes to follow (embellishing here and there as I see fit). But it turned out that just combining the key elements (vegetables... beef... kind of a no-brainer) can turn out a fabulous concoction.
The soup above is made with four carrots, four russet potatoes, 1lb. of beef, a small bag of pearl barley, half a small freezer bag of green beans, half a small freezer bag of peas, a box of beef stock, two cups of water, salt, and Johnny's meat seasoning.
Everything was cut into small pieces and we cooked the beef through in a pan and seasoned it before putting it to boil with the potatoes. Once the potatoes were semi-soft, we added the rest of the vegetables, and adjusted the seasoning as necessary. I garnished it with shredded cheddar cheese.
Two problems we found were 1. the barley soaked up the remaining liquid, so we might want to use more broth and/or water next time to make it more soup-like and 2. we needed to reduce the other ingredients to make it soup and not stew.
Next time I want to add tomato paste to add some low-light flavor and give it another added veggie boost.
Check out some more food-related posts.
DIY Interlude: La Photographie? Pas Moi!
Wednesday, March 2, 2011
I think that a lot of people find photography intimidating or feel that they don't have a good enough camera/supplies. Well, I'm here to tell you it's all in your head (as does this blog, this blog, and even this blog).
As point-and-shoot cameras are becoming more and more sophisticated, they can be used in a variety of ways to produce great creative shots. I'm not going to tell you that they are the exact same as the DSLRs out there, but if you can manipulate your camera settings and learn on the fly, you can use your point and shoot just as creatively! Also, if you're worried about megapixels, I'll let you in on a little secret: my point and shoot has more megapixels than my DSLR! Kooky, right?
Anyway, I think there are many blogs that can tell you how to do photography tips and tricks, so I am just going to outline some of the things I find really helpful to improve your skills:
1. Make a goal and stick to it!
- My goal for all of September through December was to take 1 photograph of what I wore per day at minimum. Were all those photographs good? No. Did they help me learn how to position things and work with inadequate lighting/color issues? Yes!
2. Explore your surroundings.
- Whether that means that you are hitting the pavement in suburban Bellevue or are strutting your stuff on the streets of Dhaka, Bangladesh, you should definitely have your camera on you at all times.
3. Take pictures of small things first.
- This teaches you how to make a composition and work with limited space and lighting.
4. Look back at your old photographs and look for patterns.
- If you see that most of your shots are landscapes (like mine were when I started out), start thinking of ways to branch out. My outfits photography session was very much about being able to capture people, and it involved my most reliable subject: me!
5. Engage with the photography community.
- This is where DeviantArt, Photojojo, and other photography websites come in - through seeing how other people do their work, you can learn more about how to do your own!
I can come up with many many more tips, but I think that those are the top five for me. Check out some of my photography or shoot me an email if you want a little bit more.
As point-and-shoot cameras are becoming more and more sophisticated, they can be used in a variety of ways to produce great creative shots. I'm not going to tell you that they are the exact same as the DSLRs out there, but if you can manipulate your camera settings and learn on the fly, you can use your point and shoot just as creatively! Also, if you're worried about megapixels, I'll let you in on a little secret: my point and shoot has more megapixels than my DSLR! Kooky, right?
Anyway, I think there are many blogs that can tell you how to do photography tips and tricks, so I am just going to outline some of the things I find really helpful to improve your skills:
1. Make a goal and stick to it!
- My goal for all of September through December was to take 1 photograph of what I wore per day at minimum. Were all those photographs good? No. Did they help me learn how to position things and work with inadequate lighting/color issues? Yes!
2. Explore your surroundings.
- Whether that means that you are hitting the pavement in suburban Bellevue or are strutting your stuff on the streets of Dhaka, Bangladesh, you should definitely have your camera on you at all times.
3. Take pictures of small things first.
- This teaches you how to make a composition and work with limited space and lighting.
4. Look back at your old photographs and look for patterns.
- If you see that most of your shots are landscapes (like mine were when I started out), start thinking of ways to branch out. My outfits photography session was very much about being able to capture people, and it involved my most reliable subject: me!
5. Engage with the photography community.
- This is where DeviantArt, Photojojo, and other photography websites come in - through seeing how other people do their work, you can learn more about how to do your own!
I can come up with many many more tips, but I think that those are the top five for me. Check out some of my photography or shoot me an email if you want a little bit more.
DIY Interlude: Cookie Dough
Wednesday, February 23, 2011
There's not much left in this batch... I wonder who's been eating it all...
As my life has been taken over by theorizing how the body works in society and reading Nabokov, you can imagine that I've been caught up in the cerebral a lot these days.
Yet, whenever I spend too much time reading or working on an essay or doing something academically stimulating, my hands start itching to be used in some other way.
And that's where cookie dough comes in.
Courtesy of this wonderful recipe blog post by Joy the Baker, I have an outlet for my 1. constant need to do something domestic, and 2. leftover Greek yogurt.
Mine is pictured above, but you should definitely try making this recipe for yourself - it's eggless so there's no fear of salmonella and if you use peanut butter instead of yogurt, it becomes a dairy free treat! Enjoy!
Subscribe to:
Posts (Atom)